
What Is The Best Way To Clean A Gaming Mouse?
So, you’ve been gaming for hours on end, and now you’ve noticed that your gaming mouse isn’t functioning as smoothly as before. Fret not, as this article will provide you with the ultimate solution to restore your gaming mouse to its pristine condition. Whether it’s sticky buttons or a grimy surface, we’ve got you covered with the best way to clean a gaming mouse. Say goodbye to laggy gameplay and hello to a refreshed and responsive gaming experience. Cleaning your gaming mouse is an important part of its maintenance and ensuring optimal performance. Whether you’re an avid gamer or use your gaming mouse for work, regular cleaning will help prevent dust, grime, and debris from building up and potentially affecting its functionality. In this comprehensive guide, we will walk you through the step-by-step process of cleaning your gaming mouse, from gathering the necessary supplies to reassembling the mouse after cleaning.
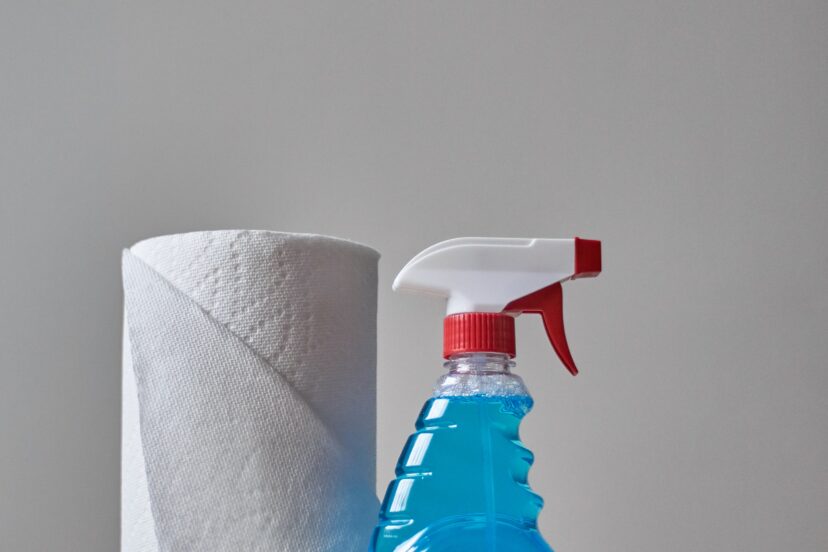
Preparation
Before you begin cleaning your gaming mouse, it’s essential to gather the necessary supplies to ensure a smooth and effective cleaning process. You will need a few items to get started:
Gather necessary supplies
- Cotton swabs
- Rubbing alcohol (isopropyl alcohol)
- Compressed air canister
- Microfiber cloth
- Mild cleaning solution (such as a mixture of water and mild soap)
- Optional: Screwdriver (if your mouse has removable parts)
Once you have the required supplies, you can proceed to the next steps.
Turn off and unplug the mouse
To ensure safety and prevent any accidents during the cleaning process, it’s crucial to turn off and unplug your gaming mouse from your computer. This step will prevent any accidental clicks or movements while cleaning, ensuring you can focus on the task at hand without any interference.
Disconnect and remove any removable parts
If your gaming mouse has removable parts, such as button covers or additional weights, it’s advisable to disconnect and remove them before cleaning. This will allow you to clean each component thoroughly and prevent any damage or mishaps during the cleaning process. Carefully detach any removable parts according to the manufacturer’s instructions, if applicable.
Dry Cleaning
The first step in cleaning your gaming mouse is to remove surface dust and dirt. Dry cleaning will help eliminate loose particles and prepare the mouse for a more thorough cleaning process.
Use compressed air to remove surface dust
Using a can of compressed air, carefully direct short bursts of air to remove any dust or debris resting on the surface of your gaming mouse. Pay extra attention to crevices and hard-to-reach areas where dust tends to accumulate. The compressed air will dislodge loose particles, making it easier to clean the mouse effectively.
Clean the exterior with a microfiber cloth
Next, take a microfiber cloth and gently wipe the exterior of your gaming mouse. The soft and lint-free nature of microfiber cloths makes them ideal for safely cleaning delicate surfaces without leaving scratches or residue. Wipe the entire exterior, including the top, sides, and bottom, ensuring you remove any remaining dust or smudges.
Clean the mouse feet
To ensure smooth and precise movement of your gaming mouse, it’s important to clean the mouse feet. These small pads on the bottom of the mouse facilitate gliding across the mouse pad or desk surface. To clean the mouse feet, gently wipe them with a microfiber cloth to remove any dirt or grime. If the mouse feet are heavily worn or damaged, you may consider replacing them for optimal mouse performance.

Cleaning the Buttons
The buttons on your gaming mouse are heavily used and can accumulate dirt, sweat, or residue over time. Cleaning the buttons will help maintain their responsiveness and prolong their lifespan.
Remove button covers (if applicable)
Before cleaning the buttons, check if your gaming mouse has removable button covers. Some mice feature covers that can be easily detached for cleaning purposes. If your mouse has this feature, carefully remove the button covers following the manufacturer’s instructions. Cleaning the covers separately will help ensure a thorough cleaning process.
Use a cotton swab soaked in rubbing alcohol
Dampen a cotton swab with rubbing alcohol (isopropyl alcohol). Gently rub the swab on the surface of each button, removing any accumulated dirt or residue. Pay close attention to the crevices and edges of the buttons, as these areas are more prone to collecting dirt and grime. The rubbing alcohol acts as a disinfectant, effectively removing any germs present on the buttons.
Allow the buttons to dry before reassembling
After cleaning the buttons with rubbing alcohol, it’s important to allow them to air dry completely. This step ensures that there is no moisture left behind, which could potentially damage the internal components when the mouse is reassembled. Be patient and give the buttons ample time to dry before moving on to the next steps.
Cleaning the Scroll Wheel
The scroll wheel on your gaming mouse is another component that requires regular cleaning. Over time, debris can accumulate within the wheel, affecting its smooth scrolling functionality.
Gently rotate the scroll wheel to dislodge debris
To begin cleaning the scroll wheel, gently rotate it in both directions. This rotational movement will help dislodge any debris or particles that may be trapped within the wheel mechanism. Continue rotating the scroll wheel for a few seconds to ensure maximum dislodgement of any built-up debris.
Use compressed air to remove any remaining particles
After rotating the scroll wheel, use a can of compressed air to blow away any remaining particles. Direct short bursts of air into the scroll wheel area, ensuring that you cover the entire circumference of the wheel. This will help remove any stubborn debris that may not have been dislodged by the rotational movement alone.
Wipe the scroll wheel with a microfiber cloth
Lastly, take a clean microfiber cloth and wipe the scroll wheel gently. Ensure that you remove any remaining dirt or residue from the surface of the wheel. By doing so, you’ll maintain the smooth scrolling functionality of your gaming mouse and enhance your overall user experience.

Deep Cleaning
If your gaming mouse requires a more thorough cleaning, a deep cleaning process is recommended. This involves disassembling certain components and cleaning them individually.
Remove the mouse feet
To begin the deep cleaning process, carefully remove the mouse feet. These are typically attached to the bottom of the mouse using adhesive, so exercise caution while detaching them. If necessary, use a flat tool, such as a plastic spatula, to gently lift the edges of the mouse feet and peel them off. Removing the feet will provide access to the internal components that require cleaning.
Clean the housing with a mild cleaning solution
Once the mouse feet are removed, it’s time to clean the housing of your gaming mouse. Mix a mild cleaning solution by combining water and a small amount of mild soap. Moisten a microfiber cloth with this solution and gently wipe the internal and external surfaces of the mouse housing. Pay extra attention to areas that may have accumulated dirt or grime, such as the crevices around the buttons and scroll wheel. Avoid using excessive moisture, as it can seep into the internal components and potentially damage the mouse.
Clean the mouse wheel assembly
While you have access to the internal components, it’s advisable to clean the mouse wheel assembly. This area, which houses the scroll wheel mechanism, can accumulate dirt and interfere with smooth scrolling. Using a cotton swab moistened with rubbing alcohol, carefully clean the mouse wheel assembly, paying attention to any visible dirt or debris. Once cleaned, allow the assembly to air dry completely before proceeding to the next steps.
Cleaning the Sensor
The sensor of your gaming mouse is responsible for accurately tracking movement and ensuring precise cursor control. Keeping the sensor clean is essential for maintaining optimal performance.
Use a cotton swab dipped in isopropyl alcohol
To clean the sensor, dip a cotton swab in isopropyl alcohol. Take care to wring out any excess alcohol to avoid dripping. The cotton swab should be damp but not soaked. Excessive moisture can damage the sensor and other electronic components of the mouse.
Gently clean the sensor lens and surrounding area
With the damp cotton swab, gently clean the sensor lens and the surrounding area. The sensor lens is typically located near the bottom of the mouse. Use small circular motions to remove any dirt or smudges that may have accumulated on the lens. Be careful not to apply excessive pressure or poke at the sensor, as this could damage it.
Allow the sensor to dry before reassembly
After cleaning the sensor, it’s crucial to allow it to dry completely before reassembling the mouse. Air drying is the safest and most effective method. Placing the mouse in a well-ventilated area will expedite the drying process. Ensure that the sensor area is free from moisture or any residual alcohol before moving on to the reassembly stage.

Reassembling the Mouse
Once all the components are thoroughly cleaned and dry, it’s time to reassemble your gaming mouse. Follow these steps to ensure a proper and secure reassembly.
Place the mouse feet back onto the mouse
Begin by carefully aligning the mouse feet with their respective positions on the bottom of the mouse. Slowly press down on each foot, ensuring that they adhere properly to the surface. Applying even pressure will help prevent air bubbles or loose corners.
Reattach any removable parts
If you removed any button covers, additional weights, or other removable parts, now is the time to reattach them. Refer to the manufacturer’s instructions, if necessary, to ensure these parts are securely and correctly placed. Take your time to guarantee a reliable connection and prevent any potential issues.
Ensure everything is securely in place
Before plugging your gaming mouse back into your computer, double-check that all components are securely in place. Ensure buttons, scroll wheels, and any other movable parts are functioning correctly. Confirm that the mouse feet are firmly adhered and that there are no loose or misaligned elements. Proper reassembly is essential to ensure your gaming mouse functions as intended.
General Maintenance Tips
To keep your gaming mouse in optimal condition, regular cleanings are necessary. Along with the comprehensive cleaning process outlined above, there are a few general maintenance tips you can follow:
Regularly clean your mouse to prevent buildup
Regular cleaning of your gaming mouse is crucial to prevent the buildup of dust, dirt, and grime. Depending on your usage, it’s recommended to clean your mouse every few weeks or whenever you notice it becoming dirty. By incorporating regular cleaning as part of your mouse maintenance routine, you’ll ensure its longevity and peak performance.
Avoid using harsh chemicals or excessive moisture
When cleaning your gaming mouse, it’s important to avoid using harsh chemicals or excessive moisture. Harsh cleaners can damage the surface of the mouse, while excessive moisture can seep into the internal components and compromise their functionality. Stick to mild cleaning solutions and use minimal moisture to protect your gaming mouse.
Store your gaming mouse properly when not in use
When you’re not using your gaming mouse, it’s essential to store it properly to prevent dust and dirt from accumulating. Ideally, store your mouse in a protective case or within a clean, dust-free environment. This will minimize the need for frequent cleanings and ensure your gaming mouse remains in optimal condition.

Cleaning Guide for Different Mouse Types
Cleaning techniques may vary depending on the type of gaming mouse you own. Here are a few guidelines for cleaning different types of gaming mice:
Cleaning an optical gaming mouse
For optical gaming mice, the cleaning process is relatively similar to the general cleaning outlined above. Pay extra attention to the sensor lens, as it directly affects the accuracy and tracking capabilities of your mouse.
Cleaning a laser gaming mouse
Laser gaming mice operate using a laser sensor rather than an optical sensor. While the cleaning process remains similar, take care not to obstruct the laser lens during cleaning. Ensure that the sensor lens is free from smudges or debris that could affect the laser’s performance.
Cleaning a wireless gaming mouse
Cleaning a wireless gaming mouse follows the same steps as cleaning a wired gaming mouse. However, it’s crucial to disconnect the wireless receiver from your computer before cleaning. Clean the receiver and the mouse separately following the guidelines mentioned above. Once both components are clean and dry, reestablish the wireless connection before use.
Frequent Cleaning vs. Occasional Deep Cleaning
Determining the frequency of cleaning your gaming mouse depends on your usage and personal preference. Regular cleaning, involving surface dust removal and button cleaning, should be done every few weeks or when you notice visible dirt or grime. Deep cleaning, which involves disassembling certain components, can be done less frequently, such as every few months or as needed.
Difference between frequent cleaning and deep cleaning
Frequent cleaning refers to the routine maintenance steps, such as removing surface dust, cleaning buttons, and general upkeep. Deep cleaning, on the other hand, involves more extensive cleaning, such as disassembling the mouse and cleaning internal components.
Determining the cleaning frequency based on usage
The frequency at which you clean your gaming mouse may vary based on your usage patterns. If you use your gaming mouse extensively for gaming or other tasks, you may need to clean it more frequently to prevent excessive buildup. Conversely, if your mouse sees minimal use, occasional deep cleaning may be sufficient.
Incorporating both regular and deep cleaning for optimal results
To ensure optimal performance and longevity of your gaming mouse, it is recommended to incorporate both regular cleaning and occasional deep cleaning. Regular cleaning will help prevent buildup and maintain cleanliness, while deep cleaning will address more stubborn dirt or grime that may have accumulated over time. By finding a balance between these cleaning methods, you can ensure your gaming mouse remains in top condition for an extended period.
In conclusion, cleaning your gaming mouse is an essential part of its maintenance and longevity. By following the step-by-step guide outlined in this article, you can effectively clean your gaming mouse and maintain its optimal performance. Remember to gather the necessary supplies, disconnect and remove any removable parts, and thoroughly clean each component, including the buttons, scroll wheel, housing, sensor, and mouse feet. Regular maintenance and occasional deep cleaning will help keep your gaming mouse in peak condition, allowing you to enjoy seamless and precise control during your gaming or work sessions.


