How Do I Build A Gaming PC? 4 Simple But Important Steps
Are you ready to level up your gaming experience? If you’ve ever wondered how do I build a gaming PC, look no further! In this article, you’ll find all the essential tips and steps you need to know to successfully assemble your very own gaming powerhouse. Whether you’re a novice or have some tech-savvy skills, we’ve got you covered. Get ready to embark on an exciting journey of building the ultimate gaming setup that will take your gameplay to new heights!
Choosing the Components
Identifying the Purpose of the PC
When it comes to building a gaming PC, the first step is to identify the purpose of the PC. Are you looking for a high-end gaming experience with all the latest and greatest games? Or are you a casual gamer who wants to play older games and indie titles? By understanding the purpose of your PC, you can make informed decisions when it comes to selecting the components.
Determining the Budget
Before diving into the world of PC components, it’s essential to determine your budget. Building a gaming PC can be as expensive or as cost-effective as you want it to be. By setting a budget, you’ll have a clear idea of the price range you should be looking at for each component.
Selecting the Processor
The processor, or CPU, is often considered the brain of the PC. It is responsible for executing instructions and performing calculations. When selecting a processor for your gaming PC, you’ll need to consider factors like the number of cores, clock speed, and compatibility with other components. Popular brands include Intel and AMD, with each offering a range of processors to suit different needs and budgets.
Choosing the Graphics Card
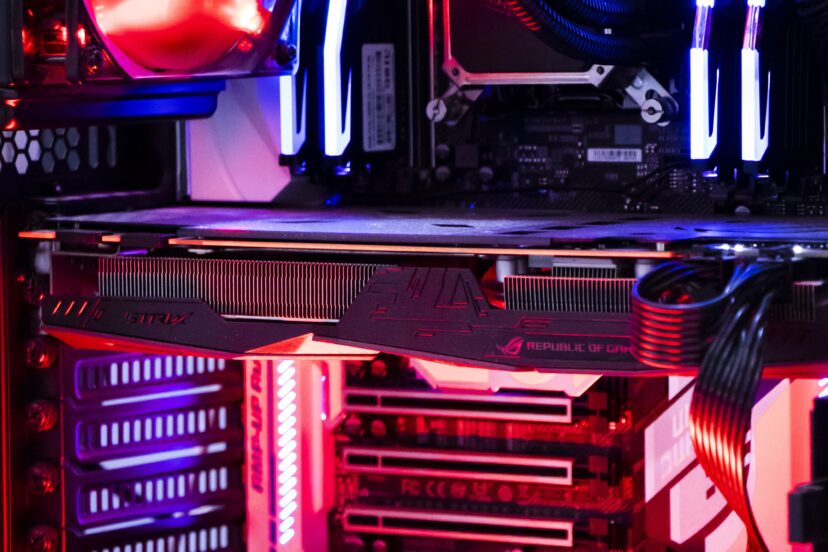
The graphics card, or GPU, is a crucial component in any gaming PC. It is responsible for rendering images, textures, and animations, providing you with a smooth and visually stunning gaming experience. When choosing a graphics card, consider factors such as performance, VRAM, and compatibility with your chosen processor. Nvidia and AMD are the leading manufacturers for graphics cards, each offering various options for different budgets and gaming requirements.
Selecting the Motherboard
The motherboard is the backbone of your gaming PC, holding all the other components together. It acts as a communication hub, allowing different parts of your PC to interact with each other. When choosing a motherboard, consider factors such as socket compatibility with your chosen processor, the number of expansion slots, and support for features like overclocking and high-speed storage.
Choosing the RAM
Random Access Memory (RAM) is responsible for temporarily storing data that your computer is actively using. When it comes to gaming, having sufficient RAM is essential for smooth gameplay and multitasking. Consider factors such as speed, capacity, and compatibility with your chosen motherboard when selecting RAM for your gaming PC. Look for reputable brands like Corsair, G.Skill, and Kingston for reliable performance.
Selecting the Storage
Storage is where all your game files, operating system, and personal data will be stored. There are two main types of storage: solid-state drives (SSDs) and hard disk drives (HDDs). SSDs are faster and more expensive, while HDDs offer larger capacities at a more affordable price. Consider your storage needs and budget when choosing between SSDs and HDDs, or opt for a combination of both for the best of both worlds.
Choosing the Power Supply
The power supply unit (PSU) is responsible for providing power to all the components in your PC. It’s important to choose a PSU that can handle the power requirements of your chosen components. Look for a PSU with a sufficient wattage rating, good efficiency rating, and reputable brand. Corsair, EVGA, and Seasonic are well-known brands for reliable power supplies.
Selecting the Case
The case not only houses all the components of your gaming PC but also determines its overall visual aesthetic. When choosing a case, consider factors such as size, airflow, cable management options, and compatibility with your chosen components. There are various case sizes and styles available, from compact mini-ITX cases to full-size ATX towers, so choose one that suits your preferences and needs.
Choosing Other Components
Aside from the main components mentioned above, there are a few other components you may need to consider. These include a CPU cooler to keep your processor cool during intense gaming sessions, fans for improved airflow, and additional peripherals such as a gaming keyboard, mouse, and monitor. These components can greatly enhance your gaming experience, so choose them based on your personal preferences and budget.

Assembling the PC
Preparing the Workspace
Before diving into assembling your gaming PC, it’s important to prepare your workspace. Find a clean and well-ventilated area with a flat surface to work on. Make sure you have all the necessary tools, such as a screwdriver and cable ties, within reach. It’s also a good idea to have an anti-static wristband to prevent any static electricity from damaging your components.
Installing the CPU
Installing the CPU is a delicate process that requires careful handling. Start by unlocking the CPU socket on the motherboard and carefully align the notches on the CPU with those on the socket. Gently lower the CPU into the socket and secure it in place. Be sure not to apply excessive force or touch the delicate pins on the CPU.
Installing the Cooler
To keep your CPU cool, you’ll need to install a cooler. There are two main types of coolers: air coolers and liquid coolers. Air coolers are more affordable and easier to install, while liquid coolers offer better cooling performance but can be more expensive. Follow the manufacturer’s instructions to securely mount the cooler onto the CPU, ensuring proper contact between the cooler and the CPU for efficient heat dissipation.
Mounting the Motherboard
Place your motherboard onto the standoffs in the case, lining up the screw holes with the standoffs. Gently screw in the motherboard using the provided screws, being careful not to overtighten. Make sure the motherboard is securely mounted, as any loose connections can cause issues with performance and stability.
Installing the RAM
Inserting RAM modules is a relatively straightforward process. Locate the RAM slots on the motherboard and unlock the retention clips. Carefully align the notch on the RAM module with the slot and press it firmly into place. The retention clips should automatically snap into position, securing the RAM module in place.
Connecting the Storage Devices
Connect your storage devices, such as SSDs or HDDs, to the appropriate SATA ports on the motherboard. Secure the drives in the designated drive bays using screws or tool-less mounting options. Connect the SATA power cables from the PSU to the drives, and use SATA data cables to connect the drives to the motherboard.
Installing the Graphics Card
Insert the graphics card into the appropriate PCIe slot on the motherboard, ensuring it is fully seated. Secure the graphics card to the case using screws or brackets, depending on your case design. Connect the necessary PCIe power cables from the PSU to the graphics card for it to receive power.
Connecting the Power Supply
Connect the main 24-pin power connector from the PSU to the motherboard, ensuring a secure connection. Depending on your components and power requirements, you may also need to connect additional power cables, such as 4-pin or 8-pin connectors for the CPU, PCIe power connectors for the graphics card, and SATA power connectors for storage devices.
Installing Additional Components
This is the stage where you can install any additional components you’ve chosen, such as case fans or RGB lighting. Follow the manufacturer’s instructions to mount these components in the appropriate locations within your case. Routing cables neatly and using cable ties can help with cable management and airflow inside the case.
Cable Management
After installing all the components, it’s important to take some time to tidy up the cables inside your case. Proper cable management not only improves airflow but also gives your gaming PC a clean and professional look. Use cable ties or Velcro straps to secure and bundle cables together, routing them behind the motherboard tray or along designated cable management channels.

Installing and Configuring the Operating System
Choosing the Operating System
Before installing the operating system, you’ll need to decide which one to use. Windows is the most popular choice for gaming, offering a wide range of game compatibility and support. However, other options like Linux or macOS can also be considered depending on your preferences and the games you intend to play.
Creating an Installation Media
To install the operating system, you’ll need to create an installation media. If you’re using Windows, you can create a bootable USB drive using the official Windows Media Creation Tool. For Linux distributions, you can use software like Rufus or Etcher to create a bootable USB drive.
Booting from the Installation Media
Once you’ve created the installation media, restart your PC and access the BIOS or UEFI settings. Change the boot order to prioritize the installation media (USB or DVD drive) over the hard drive. Save the changes and exit the BIOS/UEFI settings. Your PC will then boot from the installation media, initiating the operating system installation process.
Installing the Operating System
Follow the on-screen prompts to install the operating system. You’ll need to select the language, edition, and partition where you want to install the operating system. It’s recommended to install the operating system on an SSD for faster boot times and overall system performance. Once the installation is complete, restart your PC.
Configuring the System Settings
After installing the operating system, it’s important to configure the system settings to optimize performance and ensure a smooth gaming experience. Adjust settings such as display resolution, refresh rate, power management, and sound preferences according to your preferences and hardware capabilities.
Installing Driver Software
To ensure proper functionality of your hardware components, you’ll need to install the necessary driver software. Visit the manufacturers’ websites for your motherboard, graphics card, and other components to download and install the latest drivers. These drivers enhance performance, stability, and compatibility with your gaming PC.
Updating the Operating System and Drivers
Regularly updating your operating system and drivers is crucial for security, bug fixes, and performance improvements. Enable automatic updates or manually check for updates to keep your gaming PC up to date. This ensures compatibility with the latest games and helps resolve any potential issues.
Installing Essential Software
Aside from the operating system and drivers, there are other essential software programs you may want to install. This includes antivirus software to protect your gaming PC from malware and other threats, as well as productivity tools, web browsers, and media players. Install software that suits your needs and preferences.
Customizing the Gaming PC
Now that your gaming PC is up and running with the operating system and essential software, it’s time to customize it to your liking. Personalize your desktop background, install custom themes or icons, and set up gaming-related software such as launchers or performance monitoring tools. This helps make your gaming experience more enjoyable and tailored to your preferences.

Post-Assembly Steps
Testing the System
After assembling and installing the operating system, it’s important to test your gaming PC to ensure everything is functioning correctly. Run benchmarking software to assess the performance of your components, including the CPU, graphics card, and RAM. Test different games to ensure they run smoothly and without any issues.
Troubleshooting Hardware Issues
If you encounter any hardware issues, such as overheating, system crashes, or errors, it’s essential to troubleshoot and address them promptly. Check for loose connections, update drivers, and monitor temperatures using software utilities. If necessary, consult online forums or seek professional assistance to resolve any hardware-related issues.
Configuring the BIOS/UEFI Settings
Take some time to explore the BIOS or UEFI settings to fine-tune your gaming PC. Adjust settings related to CPU overclocking, fan speeds, RAM timings, and other performance-related parameters. However, be cautious when making changes and refer to the motherboard manual or online resources for guidance.
Installing Antivirus Software
Protecting your gaming PC from malware and other online threats is crucial. Install reputable antivirus software and regularly update it to ensure the highest level of protection. Schedule regular scans and enable real-time protection to keep your gaming PC secure while you enjoy your favorite games.
Optimizing System Performance
To maximize the performance of your gaming PC, consider optimizing it by tweaking settings and performing regular maintenance. This includes disabling unnecessary startup programs, cleaning up temporary files, defragmenting drives, and keeping your software and drivers up to date. These steps can help ensure your gaming PC runs at peak performance.
Backing Up Data
Regularly backing up your data is essential to protect against data loss. Invest in an external hard drive, cloud storage, or both to back up important files, documents, and game saves. Consider using automated backup software to simplify the process and ensure regular backups are performed.
Setting Up Gaming Accessories
If you have gaming accessories like a mechanical keyboard, gaming mouse, or headset, now is the time to set them up. Connect them to your gaming PC, install any necessary drivers or software, and customize settings to your preferences. Gaming accessories can greatly enhance your gaming experience and provide added comfort and convenience.
Installing Games
With your gaming PC ready to go, it’s time to install your favorite games. Whether you prefer digital downloads or physical copies, follow the instructions provided by the game distributor or insert the game disc into your PC. Download any necessary updates or patches to ensure optimal performance and the best gaming experience.
Joining Online Gaming Communities
Part of the joy of gaming is connecting with other players. Join online gaming communities and forums to meet fellow gamers, share tips and strategies, and participate in online multiplayer matches. Engaging with the gaming community can enrich your gaming experience and open up opportunities for new friendships and collaborations.
Taking Care of Your Gaming PC
To ensure the longevity and reliability of your gaming PC, it’s important to take care of it. Keep your PC clean by regularly dusting the components, ensuring proper airflow, and cleaning the cooling fans. Avoid exposing your gaming PC to extreme temperatures or humid environments. Regularly update your software and drivers, and stay vigilant against malware and other threats.
By following these steps, you can build your own gaming PC and immerse yourself in the exciting world of gaming. Remember to have fun, explore new games, and continue to learn and adapt as technology evolves. Enjoy the power and freedom of your custom-built gaming PC!
How Do I Build A Gaming PC: Conclusion
So, you’ve ventured through the myriad details, components, and steps that answer the question, “How Do I Build A Gaming PC?” Building your own gaming rig is not just a means to an end; it’s a journey that offers a rewarding experience and a sense of accomplishment.
Firstly, understanding the hardware requirements, from the CPU and GPU to RAM and storage, is a vital part of the process. Choosing the right components is like assembling a puzzle, where each piece contributes to the final, bigger picture: a powerful machine tailored to your gaming needs.
Secondly, the actual assembly demands attention to detail. Properly installing components, ensuring good cable management, and applying thermal paste are all practices that make the difference between functional and stellar performance. Moreover, troubleshooting is a crucial skill learned through this process, equipping you for any future hardware issues.
Don’t forget that software is equally important. Installing the appropriate drivers, BIOS updates, and game management platforms like Steam or Epic Games Launcher can significantly impact your gaming experience.
Lastly, building a gaming PC is not a one-time activity but an ongoing project. With the ever-evolving landscape of video games demanding more potent hardware, upgrades will eventually become necessary. Thankfully, now that you’ve built your own machine, future updates should be a less daunting task.
In wrapping up, the query “How Do I Build A Gaming PC?” opens the door to a complex but enriching venture. You don’t just end up with a machine tailored for your gaming adventures; you also gain invaluable knowledge and skills that make you a true PC gamer. Happy gaming!